Monday, August 30, 2010

It’s time to get Saucy!

In case you thought i was about to change the viewer rating of this blog I am going to have to disappoint you. Now is a good time of year to pick to up tomatoes at the farmers market. What you might not know is that many farm stands with will sell you soft (meaning over ripe) but unblemished tomatoes quite cheaply. So why would you want to buy mushy soft tomatoes?

Well, like most vegetables Tomatoes are seasonal and although here in California the season is long it does end and you are faced with a few months of buying out tomatoes from overseas or in jar as sauce. Well you can make your own and now is a great time to do it. Yesterday I went down to the local farmers market and came back with a full flat of (over ripe) organic heirloom tomatoes (I also picked up a flat of Strawberries but more on that in another post). photo (5)

My plan was to make Passata which is essentially sieved raw tomatoes that are put in a jar and stored to make pasta sauce. I like to do things a little differently and I make version of Passata that is based on roasted tomato. It is very simple to make, so why don’t you have a go yourself.

To go with my farmers market tomatoes and sliced up 3 small onions and two heads of garlic (don’t bother to peel), also grab a handful of your favorite aromatic herb (I had some rosemary in the garden that needed a haircut).

  1. Preheat your oven to 350F
  2. Slice you tomatoes in half and lay them on a baking tray
  3. Sprinkle the onion garlic and herbs on top.
  4. Drizzle over a few glugs of olive oil (just to lightly dress)
  5. Pinch or two of salt
  6. Pinch of sugar

Place the tray in the oven for 1 hour.

After an hour remove the tray and leave to cool. Finally rub everything through a sieve (or a food mill).

What you end up with is Passata which you can either use immediately or put into sterilized bottles or jars and seal until you need them. Should keep around 6-8 months or until you have the fresh local stuff again.

Use in soups and sauces as needed…..give it a try!

Saturday, August 21, 2010

For all you chocaholics

Not posted in a while but could not let this one slide by. Been reading a book by Willie Harcourt-Cooze. Willie is a cacao farmer and chocolate maker and his book is called perhaps not surprisingly Willie's chocolate factory. This is great book, very inspirational as the first half covers the path Willie has traveled to realize his dream of producing premium chocolate bean to bar.

The second half of the book has some delicious recipes which use chocolate many of them savory. I haven't tried them all but the one below is simply awesome.

Cacao Nib Muesli
200g Porridge oats
50g Cacao nibs
50g Hazelnuts lightly crushed (I have also used walnuts)
50g flakes Almonds
150g Mixed Dried fruit (your choice, mix it up, but try a little candied Ginger)

Preheat the oven to 325F (160C)

Place the oats, cacao nibs, hazelnuts, and almonds on a baking tray and toast in the oven for 8-10 mins. Shake the tray occasionally. Leave to cool

Mix in the fruit and keep in an air tight container BlogBooster-The most productive way for mobile blogging. BlogBooster is a multi-service blog editor for iPhone, Android, WebOs and your desktop

Sunday, March 28, 2010

Making Bacon

As you May know if you read this blog I bought a whole hog this year from Windsor Family Farms. Having so much pork may seem a little daunting but it is more than just chops, roasts and ribs. One thing is bacon!


I like to dry cure the pork belly to make what we English call Streaky bacon. This is the typical American style bacon. Dry curing bacon is quite simple and you can really experiment with flavours. I used a traditional Irish cure which consists of

For every 2lb use
1tblsp Salt
1tsp Sugar (I used organic brown)
1tsp ground coriander
1tsp ground nutmeg
1tsp finely chopped bay leaf
1tsp chopped Rosemary
1tsp chopped thyme

I also added a teaspoon of crushed juniper because I like that flavor

Rub the cure into the pork belly then place on rack in a large plastic bin. If you are doing more than one rack just stack them up. Place in the refridgerator for 2-5 days (depending how salty you like your bacon). Each day simply drain off any liquid. Once done take out of cure and wash off with clean water. Dry and then place back in refridgerator on a rack over night to dry. I took out half after too days and this made a delicious breakfast bacon. I left the rest I left in for a week and this is great for salty lardons in soups and salads.

Once cured the bacon should be good for two weeks but keep it in the refridgerator below 40. You can also freeze for longer storage.

Sourcing Local Grain

The following post isn't local to Cupertino but it highlights a general issue for a locavore. Sourcing local grain is very hard and I would interested to hear from anyone who has managed to do this in the bay area. 

I believe there are farms producing grain in California but have not been able to find a retailer. I use Seven Bridges in Santa Cruz as a local supplier for my brewing needs but would like to find local milled flour for baking

-------------------------------------------------------------------------------------------------------------------------

http://feedproxy.google.com/~r/server285/sSBK/~3/Vj0RKH3L39k/

Rob Moutoux at the Dupont market last December
Grain is one item that determined locavores often stumble over. Typically, it's just not widely available, if grown at all. That's why we were glad back in December to report that Rob Moutoux, third generation of local farmers, was at the Dupont Circle farmers market selling several varieties of grain he was growing near the family farm in Loudon County.
At the time, Rob had about 10 acres planted and was producing some 30,000 p0unds of grain he hoped to place in local stores. But now he has written customers and friends that he will no longer be offering his grain at farmers markets or in stores but only at the family farm stand near Purcellville. Consequently, he is also reducing the amount of acreage he is planting with grain and focusing more on the family's orchard business–for which they have been famous for years–and a CSA program.
"There is certainly a business opportunity for local grains.  It wasn't so much that the market wasn't there, though I didn't really tap into it very extensively in 2009, going to three farmer's markets," Rob said in a e-mail when I asked him to explain his decision. "When we spoke, I was looking at expanding markets through selling wholesale to local food coops and health food stores, and discontinuing the farmer's markets.  I still think that's a great idea.  The reason I'm not doing it is because it's just not a project I want to take on at this time.  I've got my hands in a lot of different projects right now, and in order to do them right, something has to give. 
"I do absolutely think that growing 30-50 acres of grains, milling them, and direct marketing them to stores is a great business model and a waiting opportunity.  Just not for me," he continued. "It would take a bit to set up the milling, volume handling, and distribution properly.  I didn't have the time to dive in and I didn't want to half ass it.  Orchards, veggies, consulting, and the home farm stand take up plenty of time for me at the moment.  Who knows what will come in the future, though, and I am still growing the grains and selling them at our farm stand…
"I will say that there are several mills in PA that are on to this sort of project already, and have their organic flours in DC area stores (not sure which ones).  It's true that grains are successful on economies of scale, and so these mills that can move, clean, store, and mill more efficiently than I could are much better suited to make a go of it.  These would be Small Valley Milling, Frankferd Farms, Annville Mill, and maybe a few others."
Perhaps some readers know of these brands and where they are being sold in the D.C. area and can share that information in the comment section.

Thursday, March 18, 2010

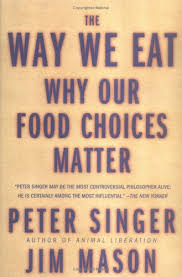
Book Review: The Way we Eat

Just finished reading "The Way we Eat: Why our food choices matter" by Peter Singer and Jim Mason. This was a very thought provoking book for me. Unlike other works on industrialized food such as Food Inc, and Omnivores dilemma this book really focused on the ethical question and how they way we eat effects others. This book provides a very detailed account of the three families with quite different lifestyles and values. It examines the food choices they make and ethical and economical assumptions that drove those choices. They also pull apart the ethics of locavore's and fair trade in similar detail.

Very interesting book which provides great information for ethical food choices and busts a number myths and plain lies around many of the stated ethical practices and badges we find today in our search for food. There is a strong, I felt too strong in places, bias towards Vegan-ism as the way to ethical nirvana. This made me want to defend my omnivorous ways, I find myself more in the Pollan/Fearnley-Whittingstall camp on the consumption of meat and the ethics of doing that, than Singer & Mason are but I respect their viewpoint.

I would recommend this book as a good complementary resource to other more popular works out there, particularly if you are concerned about the effect of your food choices on others as well as yourself.
Reblog this post [with Zemanta]

Tuesday, March 2, 2010

Garden Update

The Snowdrops are in bloom in my garden and despite what the weather is really like this is a key indicator of the end of winter and my thoughts spring (no pun intended) to gardening tasks which set things up for the prime growing season.

In truth this area is one of the few in the world that can support the growing of food crops year round but my garden is not really set up for this. Last year I managed to clear an area down the side yard of my house. Although this area is south facing, because of the proximity of the neighboring house I have to wait for the spring before I get enough light to give plants a fighting chance. The yard itself currently has two raised beds which are about 2.5 ft x 6ft and I hope to clear out a bit more ground this year to get two more similar raised beds installed. I grow a lot of plants in containers, well buckets would be a more accurate description (Home Depot sell 5 gallon buckets for about $2)  but last year I was surprised by the success I had and the amount of food I was able to harvest out of such a small Plot. My point is, that you really don't need to have a lot of space just the right combination of plants and enough sun and water to make them grow. The only tricky part is knowing what to plant and when. I took a community class last run by the Master Gardeners of Santa Clara County and they gave me a wealth of information on what, when and how to garden in our area. You can find classes in the local paper or the community college pamphlets that come twice a year.

Planning for this years planting started back at the beginning of the year when I sowed seeds for many of the summer cropping plants. My tomato, pepper and basil were started under a grow lamp and moved to a indoor windowsill once they had got a few full leaves.  Growing plants from seeds is by far the cheapest way to go and with a bit of planning up front really isn't hard. I simply sowed a few seeds in each pot then set them under the light. As the small shoots came up I thinned out each pot to one plant (just snipped the others off).


The tomato plants are already too big for the lamp box and were moved to a windowsill a couple of weeks ago they will be ready for planting out soon. The peppers and basil needed a little more time to develop but are catching up fast.

I also planted some peas, beetroot, chives and chard outside in a little polythene tented propagator. These required less heat to germinate and so could be sown outside in pots. They are also doing well and will ready for transplant into the main garden quite soon.


One new crop for this year is the potato. I decided that I missed the taste of freshly dug new potatoes just boiled in their skins and served with butter a traditional June treat in the UK. Growing them seemed the best way to get the freshest potato so I splashed out on some seed potatoes and they are currently sitting on the same windowsill as the tomato plants to enable them to sprout. A process in gardening parlance known as chitting. Potato is a great crop for growing in containers. Back home in the UK my father would grow them in garbage cans. I have some deep sturdy bags that will do the job and hopefully by June will have a bumper crop of nice new potatoes. One thing about growing from seed is that you have to hedge your bets on yield and plant sow than you will eventually plant out. This might seem a waste but I can always find people who would like a few plants for their own and so I get to pass on my labors and let others benefit.

I am planning a couple of other projects for the garden this year. Firstly I am planning to use one of my new beds to grow a "Three sisters garden" which is Native American method of planting Corn, beans and squash in a complementary manner which maximizes production in a small space. In a similar vein I am also planning a herbal garden once again influenced by Native American planting methods. In this case the garden is known as a medicine wheel and I will blog about both of these planting methods in later posts.

The absolute best way to get the freshest vegetables is to grow them yourself. Why don't you give it try, you won't be sorry there are tons of resources out there and lots of people willing to help
Reblog this post [with Zemanta]

Sunday, February 7, 2010

Bake it yourself


For some baking can be a bit of black art, indeed I was in the "I can't bake" camp for quite a while. Many feel that it is too tedious, or too hard. I grant you that it does take some practice and some patience but once you have mastered it you won't go back. Just to give you some extra incentive, next time you are in the super market picking up a loaf of sliced white (or even some of that wholewheat designer bread) take a look at the ingredients.   Baked goods is one of main places where the food labs have been having a field day. Baked goods are full of all sorts of additives and chemicals. Bread is quite basic and has the following ingredients; Flour, Water, Yeast, Salt, and optionally some oil. If your loaf  has more in it then you have some modified version of bread.

If you are dead against trying to bake your own It is worth searching around for a good baker who produces their own bread on site. Artisan bread can also be found at many farmers markets also but beware of baked good listed as artisan in supermarkets (even wholefoods) read the labels! Your other option is a bread machine, I started with one of these and you can pick one up at a reasonable price. They are simple to use and provide a great introduction to bread making. You still control what goes in your bread and I you will produce a much better loaf than you can buy.

On the other hand if you fancy trying some baking then below are my three go to recipes. I make these most weeks depending on schedule and need. I am going to start with a sweet recipe which in my opinion is fool proof and ultimately configurable to your tastes and  provisions. Unlike most baking recipes it uses a measure of volume. I use a mug, but you could use a cup or something bigger depending on the size of loaf

Fruited Bran Loaf.

I believe this recipe originates from Scotland. You need your Mug, a bowl and a baking tin (I used a medium loaf tin). Take your Mug and fill it with Bran (oat or wheat) and pour into the bowl, fill the same mug with Sugar (I use raw brown sugar but it doesn't matter) and pour into bowl. Fill the mug again with dried fruit, any combination you like or have available. Mix and match, experiment and have fun. Pour this into the bowl along with a Mug of milk. Give it a stir and leave to soak at least 4 hours. I sometimes leave over night, or put it together in the morning and complete when I come home from work.

After the mix has been soaking add a mug full of self rising flour. This might be hard to get hold of in the US but it really just a regular white flour and baking powder. I make my own (because I know it is fresh then) from stone ground white flour at a ratio of 4% baking powder to flour (100g of flour, means 4g of baking powder) in my mug this means about 1 teaspoon. Pour in your mug of self rising flour and stir to combine. Pour into your baking tin and place in a medium oven (350 deg F) a leave for at least 45 mins it can take well over an hour to cook, to test if it is cook simply press the top with your finger when it is firm (pushes back) you can pull the loaf out. Allow to cool then serve sliced with or without butter. This loaf will a week in a sealed container, but it problem will be gone quite quickly.

Soda Bread

If you have no time to make yeast leavened bread then a great quick standby is Soda Bread.  Soda bread is great with soups and stews or with a hunk of cheese and beer. It is simple to make and doesn't take much time.


Preheat your oven to 400 deg F
You will need the following ingredients

  • 250g Flour (White or Wholewheat) 
  • 5g salt
  • 2tsp baking powder
  • 150ml of Buttermilk, Thin yogurt, milk or even water
Combine dry ingredients in a bowl, then add the wet and mix with your fingers to make a dough (should be quite wet if not add more liquid) don't over mix. Turn out onto cookie sheet and form into a round dust with flour and then cut a deep cross. Place in the oven and bake for 20-20mins. This bread is best eaten warm with lashings of butter.

Daily Bread


The following recipe is the one I use for my daily bread, well I make it over 2 days or so. This recipe will work with either white or wholewheat flour. Making good bread is all about technique and that is quite an involved subject which would be impossible to cover here and I think this is something that needs to be experienced visually and youtube is a great resource. I floundered for a while not able to achieve consistent results and producing my fair share of hockey pucks as well as decent bread until I encounter a book by Daniel Stevens who is the baker for River Cottage, his techniques helped me to produce a consistent loaf of bread (see Dan on Youtube). 

Ingredients

500g Flour (White or Wholewheat or a mix)
5g of Dried Yeast
350ml of water
10 g of salt
Tablespoon of Oil

Baking bread is done in three stages. The first stage creates the sponge where the yeast is cultivated for this particular loaf it is optional but I always do it. Mix together half of the flour with all of the water and the yeast in a bowl. This will create a very wet sloppy dough. Cover the bowl and leave overnight to ferment. 

Phase two is about kneading and proving the dough ready for baking. During the night the yeast will multiply and feed on the flour and in the morning the sponge should be formed, the mixture having risen and be frothy and light. Now add the rest of the flour along with the salt and the oil. Bring together into a sticky dough. At this point a stand mixer with a dough hook is a good idea but for those without or if you want to work those muscles then hand kneading can be done (look on youtube for technique) kneading must be done for at least 15 mins longer won't hurt. Once done the dough will loose it's initial stickiness and become stretchy as the gluten formed by the kneading binds the dough. Form kneaded dough into a ball and place in an oiled bowl which has room for the bread to double in size. Cover and leave on the counter until it has doubled in size, or you can put it in the fridge go off to work and leave it rising slowly throughout the day. 

The final phase is shaping and baking. Take your risen dough and press it down knocking all the breath out of it. Turn it out onto a flat surface and shape ready for baking, place in tin if using or free form, leave to rise for an hour (2 if you brought the dough out of the fridge). If you are shaping a free form loaf then place it on a baking try. Then bring your oven up to it maximum temperature. I use a pizza stone in my oven as a baking surface but you can use a traditional baking tin. Once the oven is up to temperature, put your risen loaf in the oven and bake for 10 mins. You should cut slashes in the top of your loaf before putting it in the oven since that helps it to expand without bursting. A bread knife does a good job at slashing the bread. After 10 mins reduce the oven to 400 deg F and cook for a further 30mins. After that time remove and cool on a rack. If you are using a tin turn the bread out as soon as you can so that it doesn't sweat.

So making bread isn't for everyone, it is involved and when mastered very satisfying and it opens a whole new world to you. Donuts anyone.....well that is another post..