Sunday, August 26, 2012

St George Spirits

A couple of weekends ago my wife and I made a trip over to Alameda Island to the St George Spirits. I had sampled a few of their products over the last couple of years, specifically their Single Malt Scotch and their excellent Teroir Gin which uses botanicals from Mt Tam

From the outside the Distillery looks like any other building left derelict when the military left the area. However the view of San Francisco from the parking lot in itself is worth the trip (phone camera didn't do it justice sorry).

You enter into the tasting room and tastings are $5 but my advice is to get the tour. The tour is probably the best tour I have ever been on, full of information delivered in a humorous fashion. You will learn about the philosophy, why they use only whole fruit in their eau de vie de,which botanicals go into their absinthe and why they can call it such, the difference between vodka and gin and how they plan to break into the Bourbon market....yes I said Bourbon

After the tour you have your tasting, you can taste before the tour but I recommend the tour first so get there close the hour mark. The tour and tasting costs $15 and well worth it for the experience.

I am not going to go into details on the tasting....why? You may ask well, I want your all to visit so you can understand the process and the passion that St George brings to the art of artisanal spirits.

I hope you enjoy it as much as I did.


Sunday, August 19, 2012

Real Butter

Making your own butter is probably the simplest thing you've never done. All you need is a decent stand mixer.

Get some decent cream, organic or raw or just one those cartons in the dairy section. Dump it all into the mixer bowl, attach the whisk and whip the cream, just like if you were making a fancy desert.

Now for the clever part, when you have achieved whipped cream, keep going. In fact if you haven't done so, turn the machine onto full speed. Then get a bowl and put some ice and cold water in it. You can basically ignore the cream until you hear a sloshing noise. The contents of your bowl will now look like a horrid roiling mess. Don't be scared keep going until you see something like this.


You have achieve butter! scoop it out and place it in your ice water. Now massage it into a ball. This will squeeze the rest of the liquid out.

Now take the butter and wrap it in parchment or cling film. What you made is unsalted butter, if you want to salt it then weight your butter, measure salt to 2% of the butter weight and mix it with butter.

Now what about what is left in the mixer bowl, well that is Butter Milk. The real stuff not the artificial thick stuff you get from the supermarket.


The goods is that this is acidic and be used in baked goods. So you might want to search this blog for Soda Bread and make, or perhaps, scones or muffins. Just don't throw it away.


Monday, January 2, 2012

Simply Marmalade

Around this time of year you might find yourself with a glut of citrus fruit, perhaps you have a tree or simply just left over from an impulse buy at the supermarket over the holidays. This year mine was due to a surplus due to my weekly veg box delivery.

Marmalade is great way to preserve the citrus fruit and unlike jam it is relatively simple to make. So here is my easy general purpose Marmalading process.


  • 1Kg of Citrus (feel free to use any selection you have or a single variety)
  • 75ml Lemon Juice
  • 2Kg of sugar


Take the whole fruit and scrub well, removing the stub where the stem connected and place them whole in 2.5 Liters of cold water. Bring to the boil then cover and simmer for 2- 2.5 hours until the skins are soft and be easily punctured with a fork.

Strain and reserve the liquid you should have about 1.7 liters, if less top up with water, if more boil and reduce. Meanwhile cut the fruit in half (careful they are hot) and remove any seeds adding any liquid released to the pot of strained cooking liquid. Cut the fruit into thick, medium or thin shreds and return it all to the pan of strained liquid. Add the lemon juice and sugar and bring to the boil stirring to dissolve the sugar. Boil rapidly until setting point (104.5C/220F) is achieved - about 10 - 15 mins

Let cool for 10 mins, then stir slowly to remove any foam on the top. Finally place into warm sterilized jars (see blog post now we're jaming below) and seal. This should keep for about 2 years.

If your feeling a bit Scottish you can add about 50ml of whiskey at the end of cooking time.

Happy New Year

Saturday, November 12, 2011

The Calorie, Is it outdated?

The BBC Food Programme is an excellent show and I make time to listen to it every week. Although it is mainly based around concerns and food trends in the UK occasionally this it covers topics which relate to any region. A recent broadcast was featured on the Calorie, something I suspect many of you have been counting at some point and potentially the amount of calories in a food item has caused you to make changes in what you are choosing to eat. The premise of this broadcast is that the the Calorie as related to the consumption of food is outdated in determining how healthy something might be and even how it might affect weight gain or loss. Like most of the Food Programme shows they look at the subject from a very balanced viewpoint with both sides represented. If you are a calorie counter, or someone who is concerned  about diet and how certain foods affect your weight I suggest you give this episode a listen.


The Calorie

Mon, 24 Oct 11
Duration:
28 mins


Saturday, November 5, 2011

Home made Bangers (Sausages)

This time of year as the weather gets cooler and the nights are drawing in, my mind turns to comfort food and on my list is the sausage or as they are called in the UK bangers. Unfortunately like most things what we often find in our supermarkets are highly processed tubes of meat from suspect sources full of preservatives and often over seasoned (salted). I find that a shame beacause almost every culture on the planet has its own unique combination of meats,spices and cereals stuffed into a casing and then dried or cooked fresh into a suculent savory delight.
Given that I mosly get my meats direct from the farm in whole form, what I tend to have a lot of is good ground meat. So a few years ago I bought an inexpensve sausage stuffer and delved into the art of sausage making and I have to say that I haven't looked back. In fact, for the last three years my wife and I have hosted a sausage making party where friends come over and make sausages and share both recipies and laughs. The event has been a big success and everyone enjoys not only the event but the treats they go home with.

Most sausage recipes consist of some good ground meat and seasonings (salt and pepper) and optionally spices, herbs and fillers. The latter can be a controversial item and the use of fillers is dependent on the type of sausage you are making. In general that add both softness and moisture to the end result as the soak up a lot of juices from the other ingredients, most sausages from the UK include some kind of filler. Italian sausages tend to be all meat and if cooked alone will become drying but these are often broken up into sauces to retain all the juice when cooking. Sausages to be dried would not use fillers as they would cause spoilage. When using fillers they should always be good quality either oatmeal, bread crumbs or multi-grain cereal and should be soaked and drained before use. When using fillers about 5% by weight is a good ratio, for 1Kg of meat use 50g of filler.

There are loads of recipes online which use various combinations of seasonings however all sausages need salt and probably more that you might imagine. I good rough guide is about 5-10g of salt per kilo of meat. Because cooking has an effect on the power of seasonings it is a good idea to take a little of your mix and ether fry it or poach it in order to test for seasoning as this will allow you to adjust before stuffing.

Stuffing is basically inserting your sausage mixture into a casing. This is necessary for traditional links but you can just shape your mixture into patties but links are easier to store and freeze since the casing protects them. The are a large number of choices for casing both natural and synthetic. Most recipes will provide guidance on the type of casing. Since I normally make pork sausages I go for natural hog casings (or runners) and there are various sizes depending on your own tastes and machine. I get my sausage supplies from online sources such as Amazon and Sausage Maker who provide the casings and stuffing machines. The casings need to be soaked before use as they are stored in salt.

The process of stuffing a casing is fairly simple, no matter if you use a machine, a kitchen aid or even a funnel. Basically there is a container for the meat, a tube through which the meat is pushed and some means of forcing the meat into that tube. Firstly run the soaked casing up over the tube and gather it up. Make sure the tube is loaded with sausage meat before you tie the knot at the end of the casing (prevents and air lock). Then slowly fill with meat allowing the casing to pull off the tube. The trick is to guide the casing off the end of the tube once it is filled with the meat and making sure there are no air holes. This is vital for dried sausages as air will create spoilage. Keep stuffing the casing until you come to the end and then simple knot the casing to seal the meat in the casing. Finally you can twist the links

So here are a few of my favorite recipes, they are all pork based. Ground pork can be found in good markets like Wholefoods and Genes (locally) but if not pork shoulder or a combination of shoulder and pork belly can be used and ground up. You butcher will often do this for you.

Herby Sausage 

This has become a favorite at our sausage making parties and many of our friends rate it as one of the best they have tasted.


  • 950g coarsely ground pork
  • 50g filler
  • 7g salt
  • 20 Sage leaves
  • 20 Chives
  • 4-5 sprigs of thyme
  • bunch of Marjoram
  • 1 tsp of freshly ground black pepper.
Simply chop all the herbs finely and mix with the rest of the ingredients.


Gloucester Pork Sausage

This is from my home county in the UK and is a family favorite. Use Gloucester Old Spot pork if possible.


  •  950g coarsely ground pork
  • 50g filler
  • 10g salt
  • 1tsp freshly ground black pepper
  • 1tsp ground Nutmeg
  • 10 sage leaves finely chopped
  • 2 sprigs of thyme
  • 2 sprigs of marjoram
Chop the herbs, grind the spices and mix with the rest of the ingredients

Easy Chorizo

This is for a fresh chorizo sausage and can be put in casings or simple used as is in recipes calling for chorizo.

  • 1Kg of fresh ground pork
  • 1.5 tsp of smoked paprika
  • 1.25 tblsp of salt
  • 25ml of white wine
  • Small head of garlic minced, grated or finely chopped
  • 3 tblsp finely chopped oregano
Just mix together, check seasoning and stuff the casings.


Saturday, October 29, 2011

Be a little subversive and Occupy your garden


Roger Doiron: A Subversive Plot - How to grow a revolution in your own back yard


I found this TED talk earlier this week and felt an extreme resonance to the point which Roger Doiron makes. I took to my garden about three years ago and although it has been a struggle to find time, and resident rodents in the neighbors redwood have reduced the crop I have to say the food is by far the best food we eat. We are no near self sufficient but every little helps plus there is the added benefit of bring outdoors and exercising. I encourage you all to watch the video and take from it the points that matter to you and be a subversive and go dig your gardens and thrive....

Saturday, September 17, 2011

Simple Scones

This has to be the simplest scone recipe I have ever found. It works really well and to be honest goes against the general theory.

I was given a baking book by Paul Hollywood which I have to say is very good and as I was thumbing through this morning I happened on his scone recipe. I am familiar with the traditional way of making scones which involves mixing flour and cold butter together to form crumbs but his technique was different I had to give it a try


  • 1lb 2oz of String White Flour
  • 2 medium eggs beaten (plus 1 more egg for an egg wash)
  • 3oz of sugar (caster or bakers sugar if you have it)
  • 1oz of baking powder
  • 3oz of butter (softened! - use microwave)
  • 8fl oz milk
  • 3.5 oz of Raisins (optional --- but why not)
So here is the procedure. 

  1. Put all the ingredients (except egg wash and raisins) and put them in a mixer with a paddle attachment. or put them in a bowl and use your hands/spoon
  2. Mix on low speed for 2 mins - 5 mins if by hand
  3. combine the raisins if using
  4. Scoop out onto lightly floured surface and pat/roll in to a rectangle about 2 inch thick. 
  5. Cut out scones (use a 2 - 3 inch cutter and cut straight down, no twisting!)
  6. Place on a parchment lined baking tray and egg wash the tops (no dripping down the sides)
  7. Place in the refrigerator for 30mins while you heat the oven to 425F.
  8. After 30 mins egg wash again and then place in oven for 15 mins.
 As you can see they turned out great. This is now my go to recipe for scones.

Thursday, April 28, 2011

Prince William’s Chocolate Biscuit Cake

Well this post is a little off-piste but since there a big Royal Wedding back in my homeland and also because my wife begged me to make I did a bit of research into this simple (no-bake) cake that became a favorite of a future king and will be served at the wedding along side a more traditional wedding cake.

It should be said that there are many recipes online for this cake and they are all subtly different in nature but they all contain two main ingredients and do not require you to fire up your oven. This then is my interpretation compiled it must be said from the many versions I found and uses as many local ingredients as I could find. Unfortunately one of the main ingredients is McVities’s Rich Tea biscuits (you probably could substitute any butter biscuit) which are not local and might prove hard to find. For those readers in the Cupertino area who want the authentic article, you can find them at Genes Market in Saratoga. The other key ingredient is Chocolate and I would suggest you find a nice fair trade variety of at least 70% cocoa.

So putting the ingredients together we haveIMG_20110428_122828

  • 1x 7oz packet of Rich Tea Biscuits
  • 1 Cup of heavy cream
  • 2 tablespoons of local honey
  • 4 tablespoons of butter
  • 16oz of (at least 70%) chocolate bits
  • 1 teaspoon vanilla extract

For hardware you will need a mixing bowl and a 7-8inch springform pan which has been well greased.

To make the base of the cake simply break up the biscuits into chunks you want them to be 1/4 – 1/2 inch not crumbs. Place them in a bowl. Put the cream, honey and butter into a pan and bring to a good simmer. Turn off the heat and add the chocolate. Stir until you have a smooth glossy mixture with no lumps. Add the vanilla extract and combine. Then pour this gooey mixture over the biscuits and fold together.

Transfer the chocolate and biscuits to the springform pan and smooth out the top. Gently tap the pan on the counter to remove any air holes. Then put the whole thing into the fridge for at least 3 hours.

Once the cake has set you can gently remove it from the springform pan. It is good enough to eat right now but for an extra bit of royal flourish it is an idea to glaze it with more chocolate. To make the glaze take the following ingredientsIMG_20110428_203815

  • 2 Tablespoons of butter
  • 1/4 cup of cream
  • 6 oz of 70% chocolate

Put the butter and cream into a pan and bring to a simmer, then add the chocolate. Mix until it is smooth. Place the chilled cake onto a wire rack over some parchment. Then poor the mixture over the cake starting in the middle. User a knife or spatula to smooth the glaze over the cake and down the sides. Allow to firm up, then transfer to a plate. Keep refrigerated until serving time.

This is a very simple cake to make and would something that kids would be able to do (with supervision) and enjoy the results. If you fancy a bit of royal faire on your table then give it a go..

Saturday, March 19, 2011

100% Wholewheat Bread

I have been baking bread for a few years now and something that has escaped me is a 100% Wholemeal loaf that didn't look like frisbie, tasted like sawdust or took 3 days to make.

The problem is the lack of gluten in wholemeal flour making it hard to develop a strong structure when proving. Adding a portion of white flour can improve things but that defeats the object.

Well I discovered a recipe in Darina Allen's book called Forgotten Skills of Cooking entitled Ballymaloe brown bread. It is so simple to make, no kneading required and it yields a crusty yet soft delicious tasting loaf of bread. The recipe was developed in the 1940's by Doris Grant for the Ministry of food (no not the Jamie Oliver one).

The only bit of special kit you need is a 5x8 inch loaf tin then gather the following ingredients.

450g Stone ground whole meal flour
1tsp Salt
1tsp molasses
425ml lukewarm water
15g Dried yeast
Oil for greasing
Seeds such as sesame

Preheat oven to 450F

Grease loaf tin (I recommend lining the tin with parchment)

Mix the yeast with 140ml of water and molasses and mix. Leave for a few mins to froth.

Put the flour and salt in a bowl and mix to distribute the salt. Pour in the water and the frothy yeat mixture and mix to a sloppy dough. Note this will be too wet to knead if not add a bit more water. Mix in the bowl then put into tin, sprinkle seeds on top.

Cover tin with towel and wait for 20mins just for the dough to rise to the top of the tin. The gently place it in the oven. Leave for 20mins then turn down the oven to 400F.

Cook for 40mins then remove from tin and place loaf back in the oven for 10mins to crisp the crust. Remove and cool then slice and enjoy. A simple, everyday 100% wholemeal loaf do youself a favor and try this recipe


Saturday, March 5, 2011

Welsh cakes

I made these last weekend in preparation for St Davids day, March 1st. I remember my mother and welsh grandmother made these most weeks only they called them bakestones. There are made in a similar way to scones but cooked on a griddle like pancakes. Very with a nice cup of (fairtrade) tea. There are a number of recipies on the net but I will post my recipe later


Friday, January 7, 2011

Book Review: Four Fish: The Future of the Last Wild Food


Four Fish: The Future of the Last Wild Food by Paul Greenberg might seem like a rather dull subject and to be honest I am not sure what attracted me to pick this book for my Christmas read. Perhaps I was looking for answers to the questions I get on what fish to bye, perhaps it was my childhood passion for fishing or even the vague memories of the Icelandic cod war which I thought was such a strange thing to go to war over in my late teens. Whatever reason it was, I am glad I did. This is a remarkable book that is incredibly informative and educational while presenting the argument for a sustainable future for protein from our seas and oceans. The book  presents the story of four fish rather like the style of botany of desire by Micheal Pollen and as such outlines the human impact in the desire for the various traits of each fish and how we have driven each species to the edge of destruction and are now trying to control their existence through farming techniques with potentially negative affects on both the environment and the remaining wild forms.

Paul questions the choice of the species we have set our sights on and compares their compatibility for domestication with the animals we have selected for our meat based protein. The four fish species are the main characters in this book, their stories share a common plot and it is told in great detail and as you go through the pages the eventual conclusion is obvious. The characters we have selected are, Salmon, Bass, Cod and blue fin Tuna, the plot is similar for each although the individual stories as diverse as the characteristics of the particular fish. This isn't one of those finger pointing environmental books that leave you with more questions than you had at the start or make you feel guilty about your existing lifestyle choices. It offers real advice to consumers, the anglers who catch, the fishing industry, fish farmers and even the political bodies that set fishing policies.

If you eat fish and want to understand how to be more informed and make sustainable choices this is good book for you and it will also provide you with the information to get involved in the debate and lobbying for a sustainable industry that can provide our need for fish protein and the future of fish as a sustainable wild and domesticated source.

Friday, December 10, 2010

A Smoking Bishop

Here's something for your Christmas parties right out of the pages of A Christmas Carol. A Smoking Bishop is a hot mulled wine drink which goes back to the early 1800's and was mentioned by a repentant Scrooge in a conversation with his astonished clerk Bob Crachit at the end of A Christmas Carol

"A merry Christmas, Bob!" said Scrooge, with an earnestness that could not be mistaken, as he clapped him on the back. "A merrier Christmas, Bob, my good fellow, than I have given you for many a year! I'll raise your salary, and endeavour to assist your struggling family, and we will discuss your affairs this very afternoon, over a Christmas bowl of smoking bishop"


There are many recipes which a similar and I think it is fair to same you can swap and change the citrus component based on availability and tweak the spices to taste the only constants being the wine and ruby port. I noted down this unreferenced recipe from the cover of an old cook book so if you are in the mood for some holiday cheer Dickens style have a go


  • 6 large oranges
  • 2 large lemons
  • 120g of brown sugar (demerara)
  • 1 bottle (750ml) red wine - a decent local variety
  • 1 bottle (750ml) ruby port - California has great ruby ports
  • 8 cloves
  • 3 cinnamon sticks
  • 1/4 tsp ground ginger
  • 1/4 tsp ground cinnamon
  • 1/4 tsp ground allspice
  • 1/4 tsp ground mace
Preheat the oven to 250F(120C). Place the oranges a lemons on a clean roasting tray and place in the oven to roast until they are pale brown (about 60-90 mins). Once baked place one clove into each of the fruits and carefully place them still hot into a large bowl, pouring any juice which had run from them during baking. Add the sugar and the spices (except the cinnamon) to the bowl and pour in the wine. Gently mix to combine then cover the bowl and leave in a warm place for 24 hours. 

The next day crush the juice out of the oranges and lemons (I use a potato masher)  then strain into a saucepan and push as much liquid as possible through the sieve. Compost what is left in the sieve add the cinnamon sticks and turn up the heat to bring the wine to a high simmer for 5 mins (do not boil!). Then turn the heat down and add the port gently heat until steaming (smoking) and serve immediately.

Be sure to pour into heat proof glasses nice and hot, serve citrus slices on side and sugar so the sweet tooths can sweeten the Bishop to their own desires.

A very Merry Christmas to you all.....

Monday, October 11, 2010

Talking Dirt – Book Review

I have recently finished reading the book Talking Dirt by Annie Spiegelman the self appointed Dirt Diva. I found this to be a very good book for gardeners of all levels, from those starting to think of starting a garden through to seasoned green fingers. The style of the writing is witty and casual with lots of online references sprinkled through it (which makes it good as an e-book), each plant that is recommended is given a “Whaa-whaa” rating based on their merit and the dependant care required, a rating of 1 is good while plant with a Whaa-whaa rating of 10 should be avoided.talkingdirt

There is an excellent section on composting which really breaks down the theory and science of growing great soil. The text also covers both all of the topics key to planning, growing and maintaining a sustainable garden. I consider this to be an excellent book for anyone interested in the subject. I am finding myself dipping into it as I plan out my seasonal planting and preparations in my own garden.

Sunday, October 10, 2010

Now We’re Jamming

This is my second post on preserving the bounty of summer, this time it is that sweet favorite jam. Jam is a perfect way to preserve most summer fruits and give them a reprise during the winter months. In my last post I mentioned that i had also purchased a flat of strawberries at the farmers market, well I kept you hanging on for a while but this is the story of what I did with them. It also taught me a lesson about taking my wife to the farmers market and opening my big mouth. While walking around the market I spotted a Rose Scented Geranium plant, this is a plant I had been searching for, a quick squeeze of the leaves and the air is perfumed with rose.  ATTOFROSE2“Why do we need that?” my wife asked, and i explained that the leaves had many culinary applications including flavoring  and was especially good in strawberry Jam. I bought the geranium and a little further down we found a stall selling organic strawberries $20 per flat. Well I should say my wife found the stall and pleaded with me to make jam. Why should I have kept my mouth shut? well walking through a crowded farmers market with a flat of Strawberries and and flat of Tomatoes with a Geranium perched on top was a bit too much hard work for a hot Sunday afternoon.

Anyway back to Jam. Jam is simply softened fruit, boiled to a gel with sugar. The main problem is the pectin and acid levels of your fruit and Strawberries are low in both and need some help. You can make your own pectin stock using fruits with high pectin and acid simmered gently in water for an hour and strained however it is often easier to buy the powdered pectin and mix according to directions with your jam ingredients.

For my Strawberry Jam I used the following basic recipe

  • 1Kg Strawberries hulled with the large ones cut in half (I like good chunks of fruit in my Jam)
  • 950g Sugar
  • Pectin as instructed on box
  • 150ml lemon Juice (provides an acid boost)

Put 200g of the Strawberries into a large pan with 200g of sugar. Crush the Strawberries lightly, I use a potato masher but a fork will do. Put the pan over a gentle heat and when the fruit mixture is hot put in the rest of the Strawberries.

Heat gently stirring to agitate the fruit and bring it up to simmering point. Simmer for 5 mins then put in the rest of the sugar. Stir gently to prevent the sugar from sticking.

Add Lemon Juice then increase the heat when the mixture reaches a full boil keep it there for 8 or 9 mins. You can then test for setting point by dropping a little onto a cold plate (carefull very hot sugar mixture) and leave for a few mins, then test to see if it is setting, if you can run your finger through it and it wrinkles and leaves clean plate behind then you are good to go. If not boil for another couple of mins and try again.

Remove from the heat and stir gently until all the froth has dispersed, a little knob of butter can help this process. You are now ready to jar.

Jam needs to go into warm sterilized jars. The best way I have found is to place the clean dry jars into a low oven (150c/300f) for about 15 mins.  Put the lids in freshly boiled water.

Photo Oct 10, 1 19 00 PM It is always a good think to perk up your Strawberry jam, I put in about 5 tablespoons of Balsamic vinegar into mine along with the lemon juice to make a rich deep tasting a colored jam. If you have a rose scented Geranium then chop a few leaves and throw them in with the lemon juice.

Monday, August 30, 2010

It’s time to get Saucy!

In case you thought i was about to change the viewer rating of this blog I am going to have to disappoint you. Now is a good time of year to pick to up tomatoes at the farmers market. What you might not know is that many farm stands with will sell you soft (meaning over ripe) but unblemished tomatoes quite cheaply. So why would you want to buy mushy soft tomatoes?

Well, like most vegetables Tomatoes are seasonal and although here in California the season is long it does end and you are faced with a few months of buying out tomatoes from overseas or in jar as sauce. Well you can make your own and now is a great time to do it. Yesterday I went down to the local farmers market and came back with a full flat of (over ripe) organic heirloom tomatoes (I also picked up a flat of Strawberries but more on that in another post). photo (5)

My plan was to make Passata which is essentially sieved raw tomatoes that are put in a jar and stored to make pasta sauce. I like to do things a little differently and I make version of Passata that is based on roasted tomato. It is very simple to make, so why don’t you have a go yourself.

To go with my farmers market tomatoes and sliced up 3 small onions and two heads of garlic (don’t bother to peel), also grab a handful of your favorite aromatic herb (I had some rosemary in the garden that needed a haircut).

  1. Preheat your oven to 350F
  2. Slice you tomatoes in half and lay them on a baking tray
  3. Sprinkle the onion garlic and herbs on top.
  4. Drizzle over a few glugs of olive oil (just to lightly dress)
  5. Pinch or two of salt
  6. Pinch of sugar

Place the tray in the oven for 1 hour.

After an hour remove the tray and leave to cool. Finally rub everything through a sieve (or a food mill).

What you end up with is Passata which you can either use immediately or put into sterilized bottles or jars and seal until you need them. Should keep around 6-8 months or until you have the fresh local stuff again.

Use in soups and sauces as needed…..give it a try!

Saturday, August 21, 2010

For all you chocaholics

Not posted in a while but could not let this one slide by. Been reading a book by Willie Harcourt-Cooze. Willie is a cacao farmer and chocolate maker and his book is called perhaps not surprisingly Willie's chocolate factory. This is great book, very inspirational as the first half covers the path Willie has traveled to realize his dream of producing premium chocolate bean to bar.

The second half of the book has some delicious recipes which use chocolate many of them savory. I haven't tried them all but the one below is simply awesome.

Cacao Nib Muesli
200g Porridge oats
50g Cacao nibs
50g Hazelnuts lightly crushed (I have also used walnuts)
50g flakes Almonds
150g Mixed Dried fruit (your choice, mix it up, but try a little candied Ginger)

Preheat the oven to 325F (160C)

Place the oats, cacao nibs, hazelnuts, and almonds on a baking tray and toast in the oven for 8-10 mins. Shake the tray occasionally. Leave to cool

Mix in the fruit and keep in an air tight container BlogBooster-The most productive way for mobile blogging. BlogBooster is a multi-service blog editor for iPhone, Android, WebOs and your desktop

Sunday, March 28, 2010

Making Bacon

As you May know if you read this blog I bought a whole hog this year from Windsor Family Farms. Having so much pork may seem a little daunting but it is more than just chops, roasts and ribs. One thing is bacon!


I like to dry cure the pork belly to make what we English call Streaky bacon. This is the typical American style bacon. Dry curing bacon is quite simple and you can really experiment with flavours. I used a traditional Irish cure which consists of

For every 2lb use
1tblsp Salt
1tsp Sugar (I used organic brown)
1tsp ground coriander
1tsp ground nutmeg
1tsp finely chopped bay leaf
1tsp chopped Rosemary
1tsp chopped thyme

I also added a teaspoon of crushed juniper because I like that flavor

Rub the cure into the pork belly then place on rack in a large plastic bin. If you are doing more than one rack just stack them up. Place in the refridgerator for 2-5 days (depending how salty you like your bacon). Each day simply drain off any liquid. Once done take out of cure and wash off with clean water. Dry and then place back in refridgerator on a rack over night to dry. I took out half after too days and this made a delicious breakfast bacon. I left the rest I left in for a week and this is great for salty lardons in soups and salads.

Once cured the bacon should be good for two weeks but keep it in the refridgerator below 40. You can also freeze for longer storage.

Sourcing Local Grain

The following post isn't local to Cupertino but it highlights a general issue for a locavore. Sourcing local grain is very hard and I would interested to hear from anyone who has managed to do this in the bay area. 

I believe there are farms producing grain in California but have not been able to find a retailer. I use Seven Bridges in Santa Cruz as a local supplier for my brewing needs but would like to find local milled flour for baking

-------------------------------------------------------------------------------------------------------------------------

http://feedproxy.google.com/~r/server285/sSBK/~3/Vj0RKH3L39k/

Rob Moutoux at the Dupont market last December
Grain is one item that determined locavores often stumble over. Typically, it's just not widely available, if grown at all. That's why we were glad back in December to report that Rob Moutoux, third generation of local farmers, was at the Dupont Circle farmers market selling several varieties of grain he was growing near the family farm in Loudon County.
At the time, Rob had about 10 acres planted and was producing some 30,000 p0unds of grain he hoped to place in local stores. But now he has written customers and friends that he will no longer be offering his grain at farmers markets or in stores but only at the family farm stand near Purcellville. Consequently, he is also reducing the amount of acreage he is planting with grain and focusing more on the family's orchard business–for which they have been famous for years–and a CSA program.
"There is certainly a business opportunity for local grains.  It wasn't so much that the market wasn't there, though I didn't really tap into it very extensively in 2009, going to three farmer's markets," Rob said in a e-mail when I asked him to explain his decision. "When we spoke, I was looking at expanding markets through selling wholesale to local food coops and health food stores, and discontinuing the farmer's markets.  I still think that's a great idea.  The reason I'm not doing it is because it's just not a project I want to take on at this time.  I've got my hands in a lot of different projects right now, and in order to do them right, something has to give. 
"I do absolutely think that growing 30-50 acres of grains, milling them, and direct marketing them to stores is a great business model and a waiting opportunity.  Just not for me," he continued. "It would take a bit to set up the milling, volume handling, and distribution properly.  I didn't have the time to dive in and I didn't want to half ass it.  Orchards, veggies, consulting, and the home farm stand take up plenty of time for me at the moment.  Who knows what will come in the future, though, and I am still growing the grains and selling them at our farm stand…
"I will say that there are several mills in PA that are on to this sort of project already, and have their organic flours in DC area stores (not sure which ones).  It's true that grains are successful on economies of scale, and so these mills that can move, clean, store, and mill more efficiently than I could are much better suited to make a go of it.  These would be Small Valley Milling, Frankferd Farms, Annville Mill, and maybe a few others."
Perhaps some readers know of these brands and where they are being sold in the D.C. area and can share that information in the comment section.

Thursday, March 18, 2010

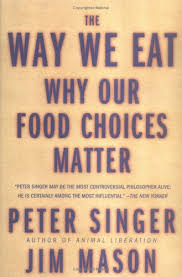
Book Review: The Way we Eat

Just finished reading "The Way we Eat: Why our food choices matter" by Peter Singer and Jim Mason. This was a very thought provoking book for me. Unlike other works on industrialized food such as Food Inc, and Omnivores dilemma this book really focused on the ethical question and how they way we eat effects others. This book provides a very detailed account of the three families with quite different lifestyles and values. It examines the food choices they make and ethical and economical assumptions that drove those choices. They also pull apart the ethics of locavore's and fair trade in similar detail.

Very interesting book which provides great information for ethical food choices and busts a number myths and plain lies around many of the stated ethical practices and badges we find today in our search for food. There is a strong, I felt too strong in places, bias towards Vegan-ism as the way to ethical nirvana. This made me want to defend my omnivorous ways, I find myself more in the Pollan/Fearnley-Whittingstall camp on the consumption of meat and the ethics of doing that, than Singer & Mason are but I respect their viewpoint.

I would recommend this book as a good complementary resource to other more popular works out there, particularly if you are concerned about the effect of your food choices on others as well as yourself.
Reblog this post [with Zemanta]

Tuesday, March 2, 2010

Garden Update

The Snowdrops are in bloom in my garden and despite what the weather is really like this is a key indicator of the end of winter and my thoughts spring (no pun intended) to gardening tasks which set things up for the prime growing season.

In truth this area is one of the few in the world that can support the growing of food crops year round but my garden is not really set up for this. Last year I managed to clear an area down the side yard of my house. Although this area is south facing, because of the proximity of the neighboring house I have to wait for the spring before I get enough light to give plants a fighting chance. The yard itself currently has two raised beds which are about 2.5 ft x 6ft and I hope to clear out a bit more ground this year to get two more similar raised beds installed. I grow a lot of plants in containers, well buckets would be a more accurate description (Home Depot sell 5 gallon buckets for about $2)  but last year I was surprised by the success I had and the amount of food I was able to harvest out of such a small Plot. My point is, that you really don't need to have a lot of space just the right combination of plants and enough sun and water to make them grow. The only tricky part is knowing what to plant and when. I took a community class last run by the Master Gardeners of Santa Clara County and they gave me a wealth of information on what, when and how to garden in our area. You can find classes in the local paper or the community college pamphlets that come twice a year.

Planning for this years planting started back at the beginning of the year when I sowed seeds for many of the summer cropping plants. My tomato, pepper and basil were started under a grow lamp and moved to a indoor windowsill once they had got a few full leaves.  Growing plants from seeds is by far the cheapest way to go and with a bit of planning up front really isn't hard. I simply sowed a few seeds in each pot then set them under the light. As the small shoots came up I thinned out each pot to one plant (just snipped the others off).


The tomato plants are already too big for the lamp box and were moved to a windowsill a couple of weeks ago they will be ready for planting out soon. The peppers and basil needed a little more time to develop but are catching up fast.

I also planted some peas, beetroot, chives and chard outside in a little polythene tented propagator. These required less heat to germinate and so could be sown outside in pots. They are also doing well and will ready for transplant into the main garden quite soon.


One new crop for this year is the potato. I decided that I missed the taste of freshly dug new potatoes just boiled in their skins and served with butter a traditional June treat in the UK. Growing them seemed the best way to get the freshest potato so I splashed out on some seed potatoes and they are currently sitting on the same windowsill as the tomato plants to enable them to sprout. A process in gardening parlance known as chitting. Potato is a great crop for growing in containers. Back home in the UK my father would grow them in garbage cans. I have some deep sturdy bags that will do the job and hopefully by June will have a bumper crop of nice new potatoes. One thing about growing from seed is that you have to hedge your bets on yield and plant sow than you will eventually plant out. This might seem a waste but I can always find people who would like a few plants for their own and so I get to pass on my labors and let others benefit.

I am planning a couple of other projects for the garden this year. Firstly I am planning to use one of my new beds to grow a "Three sisters garden" which is Native American method of planting Corn, beans and squash in a complementary manner which maximizes production in a small space. In a similar vein I am also planning a herbal garden once again influenced by Native American planting methods. In this case the garden is known as a medicine wheel and I will blog about both of these planting methods in later posts.

The absolute best way to get the freshest vegetables is to grow them yourself. Why don't you give it try, you won't be sorry there are tons of resources out there and lots of people willing to help
Reblog this post [with Zemanta]